
How to Paint on MDF for DIY Project ?
Share
How to Paint on MDF for DIY Projects
Medium-Density Fiberboard (MDF) is a popular material for DIY projects due to its affordability, smooth surface, and versatility. Whether you're crafting furniture, wall art, or custom shelving, painting MDF can elevate your project with a polished, professional finish. However, MDF’s porous nature requires specific preparation and techniques to achieve the best results. In this guide, we’ll walk you through the step-by-step process of painting MDF for your next DIY masterpiece.
Why MDF Requires Special Attention
MDF is made from compressed wood fibers and resin, which makes it denser than plywood but more absorbent than solid wood. Its edges, in particular, tend to soak up paint quickly, potentially leading to uneven finishes or swelling if not properly prepped. With the right approach, though, you can transform MDF into a beautifully painted piece that rivals factory-made products.
Materials You’ll Need
Before you begin, gather these supplies:
- MDF board: Cut to your desired size and shape.
- Sandpaper: Medium (120-grit) and fine (220-grit) grades.
- Primer: A high-quality, solvent-based or water-based primer (e.g., Zinsser B-I-N or Kilz).
- Paint: Acrylic, latex, or oil-based paint in your chosen color.
- Paintbrushes and rollers: Small brushes for edges and a foam roller for flat surfaces.
- Sealer (optional): Polyurethane or wax for added durability.
- Painter’s tape: To mask off areas if needed.
- Clean cloth: For wiping away dust.
- Drop cloth or newspaper: To protect your workspace.
- Safety gear: Gloves, mask, and goggles (especially when sanding or using solvent-based products).
Step-by-Step Guide to Painting MDF
Step 1: Prepare Your Workspace
Set up in a well-ventilated area and lay down a drop cloth to catch drips. MDF dust can be fine and messy, so keep your space clean as you go.
Step 2: Sand the Surface
Start with 120-grit sandpaper to smooth out any rough spots or imperfections on the MDF’s surface and edges. Focus especially on the cut edges, which can be fuzzy due to the manufacturing process. Follow up with 220-grit sandpaper for a silky-smooth finish. Wipe the board with a damp cloth to remove all dust—any leftover particles can ruin your paint job.
Step 3: Seal the Edges (Optional but Recommended)
MDF edges are notoriously absorbent and can swell if exposed to moisture-heavy paint. To prevent this, apply a thin layer of wood glue, edge filler, or even a diluted primer to the edges with a brush. Let it dry completely, then lightly sand again with 220-grit sandpaper. This step ensures the edges won’t drink up your paint and primer later.
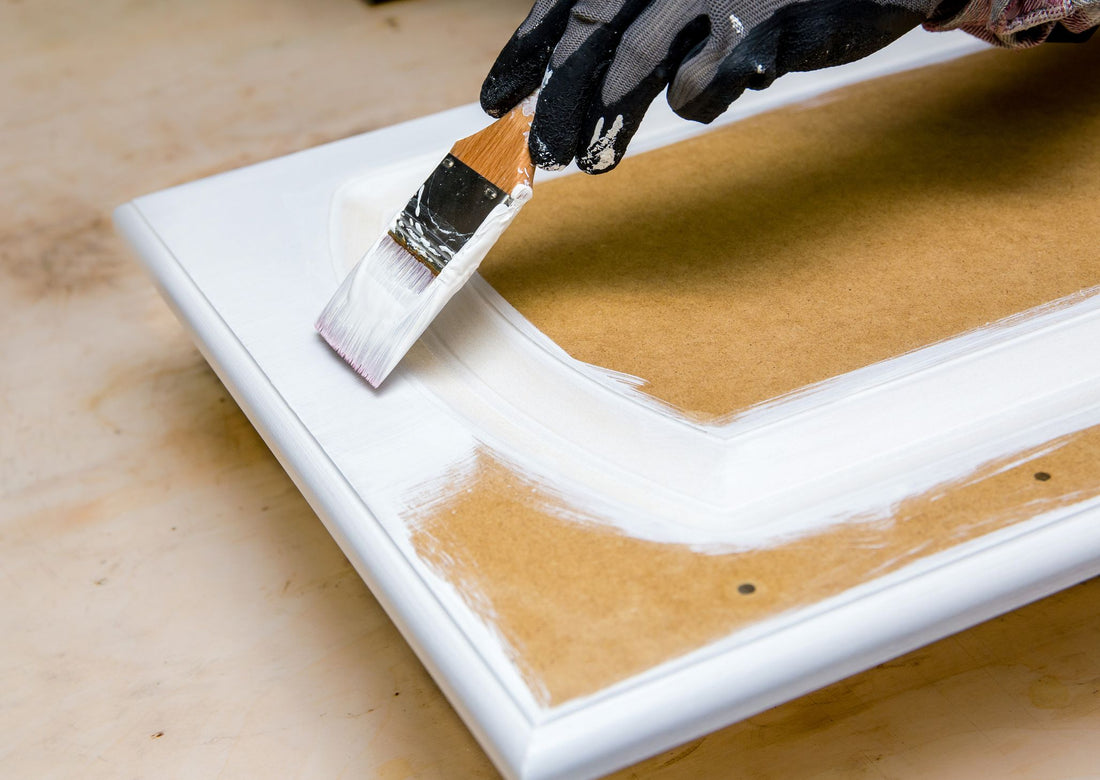
Step 4: Apply Primer
Priming is non-negotiable with MDF—it creates a barrier that reduces paint absorption and ensures even coverage. Use a solvent-based primer for the best adhesion and sealing power, especially if you’re painting something that’ll see wear and tear (like furniture). Apply a thin, even coat with a foam roller on flat surfaces and a brush for edges and corners. Let it dry fully (check the primer’s label for drying time), then lightly sand with 220-grit sandpaper to smooth out any raised grain. Wipe away dust before moving on.
Step 5: Paint Your MDF
Now for the fun part! Choose a paint suited to your project—acrylic or latex works well for most indoor DIYs, while oil-based paint offers extra durability for high-traffic items. Apply the first coat with a foam roller for a streak-free finish on large areas, and use a brush for detailed spots. Work in thin layers to avoid drips, and let the first coat dry completely (usually 2-4 hours, depending on the paint). Lightly sand between coats with 220-grit sandpaper for a flawless result, then apply a second coat. Two coats are typically enough, but add a third if you want deeper color or better coverage.
Step 6: Add a Protective Finish (Optional)
For projects that’ll face daily use—like a table or shelf—seal the painted MDF with a clear polyurethane topcoat or furniture wax. Brush or roll it on evenly, following the product’s instructions, and let it cure fully. This step adds durability and protects against scratches or moisture.
Step 7: Clean Up and Admire
Once everything is dry, remove any painter’s tape, clean your tools, and step back to enjoy your handiwork. Your MDF project should now boast a smooth, vibrant finish ready to shine in your home.
Tips for Success
- Avoid water-heavy paints without priming: MDF can warp or swell if too much moisture seeps in.
- Test your paint: Try it on a scrap piece of MDF first to ensure you like the color and finish.
- Work in thin layers: Thick coats can lead to drips or uneven drying.
- Ventilation is key: Paint and primer fumes can be strong, so keep air flowing.
Common Mistakes to Avoid
- Skipping primer: This leads to patchy, absorbent spots, especially on edges.
- Not sanding enough: Rough surfaces or unsanded primer can leave a gritty texture.
- Rushing drying times: Wet layers can smear or peel if you don’t wait.
Conclusion
Painting MDF for a DIY project is a straightforward process when you follow these steps. With proper prep, priming, and patience, you can achieve a stunning, long-lasting finish that brings your creative vision to life. So grab your supplies, pick a color, and start transforming that plain MDF board into something extraordinary—your next DIY triumph awaits!
Happy crafting!